
Traffic generated by Large Language Models (LLMs), such as ChatGPT and Gemini, is increasing rapidly in 2025. As these AI technologies continue to evolve, it is becoming essential for businesses to monitor and analyze the traffic volume that LLMs bring to their websites.
Google has mentioned they have plans to add a dedicated channel for AI generated traffic in GA4, however, this may take some time to be implemented.
This guide presents several ways to visualize, now, the amount of traffic that LLMs bring to your GA4 property.
Filter on Standard Reports
This method focuses on creating a filter on the Reports section on GA4. To capture LLM traffic in these reports follow these steps:
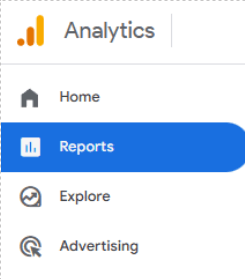
1. Go to the Reports section located on the left panel of your GA4 property.
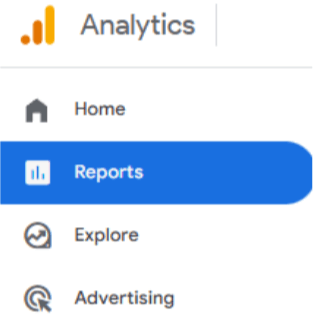
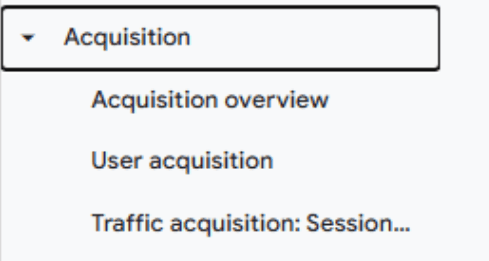
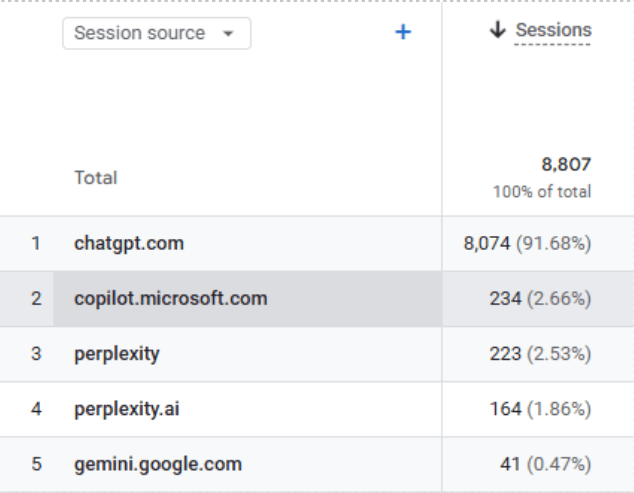
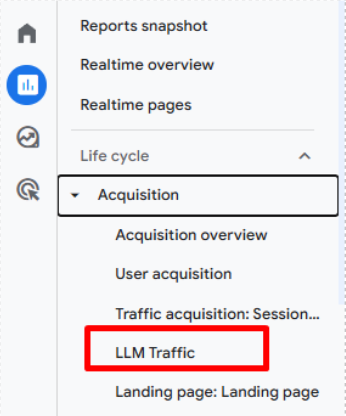
2. Open the Traffic Acquisition report, under Acquisition, to check session level data, or alternatively, open the User Acquisition report for user level data.
3. Select the dimension you want to see in the report by clicking on the box located on the left side of the report table, below the graph. Ideally, you will want to choose a dimension that contains the words Source / Medium or Source.

4. *Tip: A secondary dimension can be added to the report to get more granular data (if needed) by clicking on the + sign on the right of the primary dimension.
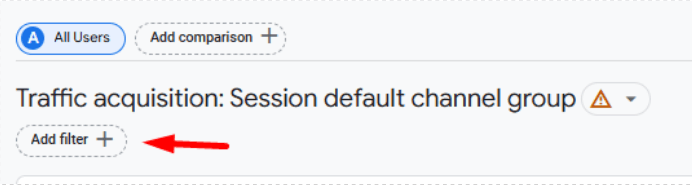
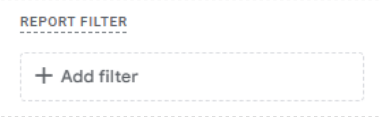
5. Click on Add filter at the top of the report, just below the report title.
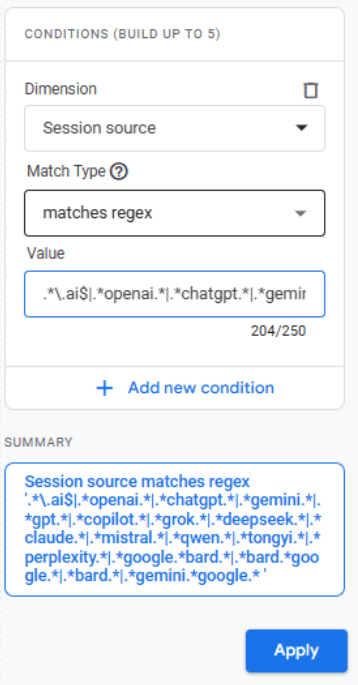
6. A panel opens on the right side. Select Session Source as dimension if you are on the Traffic Acquisition report (or choose First User Source for the User Acquisition report).
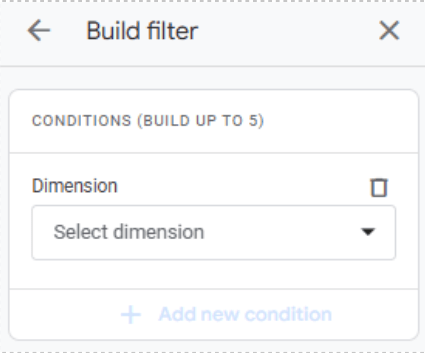
7. Select matches regex on the Match Type field.
8. Add the regex rule below on the Value field:
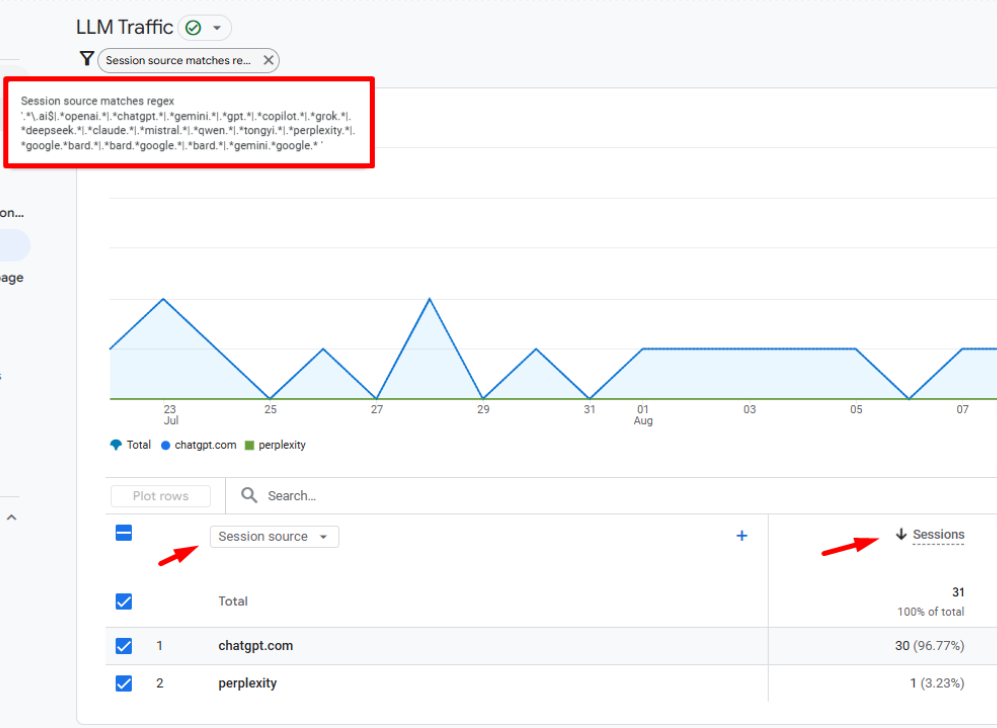
.*\.ai$|.*openai.*|.*chatgpt.*|.*gemini.*|.*gpt.*|.*copilot.*|.*grok.*|.*deepseek.*|.*claude.*|.*mistral.*|.*qwen.*|.*tongyi.*|.*perplexity.*|.*google.*bard.*|.*bard.*google.*|.*bard.*|.*gemini.*google.*
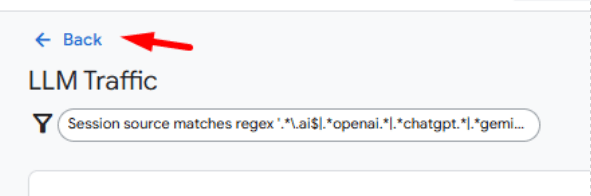
9.Click Apply. You will have a filter that looks like the following image.

10. The report will show data only for LLMs now.
Filter on Exploration Reports
This method focuses on creating a custom report on Explorations which includes adding a filter for LLM traffic. For this, we will need to create a report from scratch. Follow these steps:
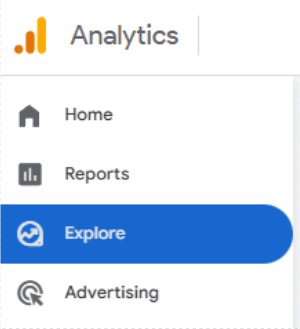
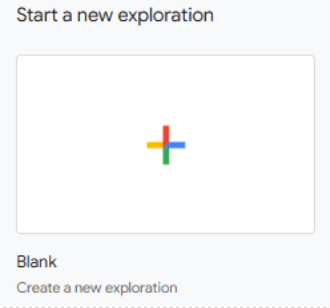
1. Go to the Explore section located on the left panel of your GA4 property.
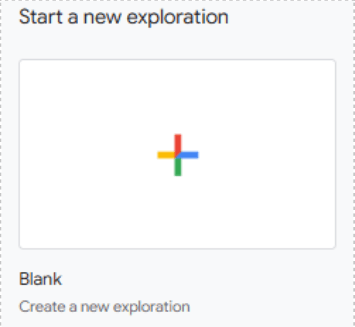
2. Start a new exploration by clicking on the Blank template denoted by a + sign.
3. On the Variables column at the left, click on the + sign for Dimensions. Select Session Source. Alternatively, you can select First User Source. Click on confirm.
4. On the same column, click on the + sign for Metrics. Select Sessions if you chose Session Source. Select Total Users if you chose First User Source. Click on confirm.
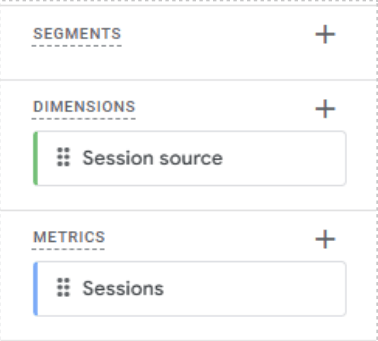
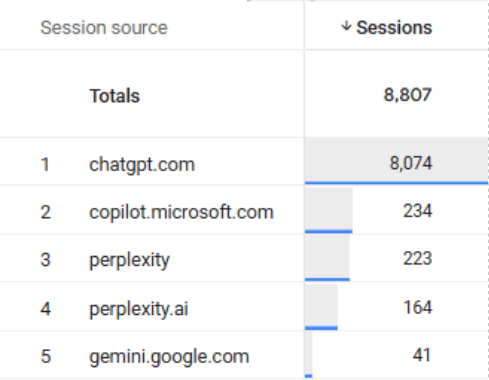
5. Double click on the dimension and metric to add to the report. They will be added in the Settings column as well as in the table on the right. In the example below, Session Source and Sessions were double clicked.
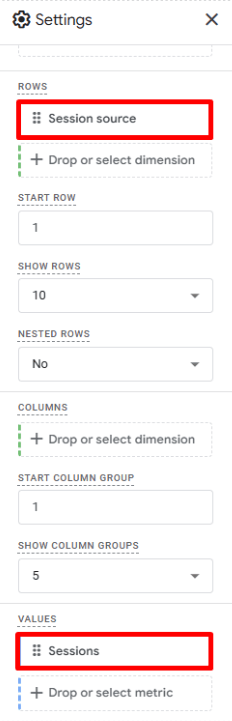
6. On the lower section of the Settings column, click on the box below Filters and select Session Source.
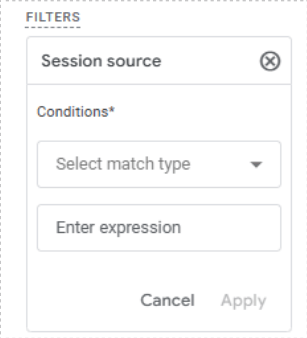
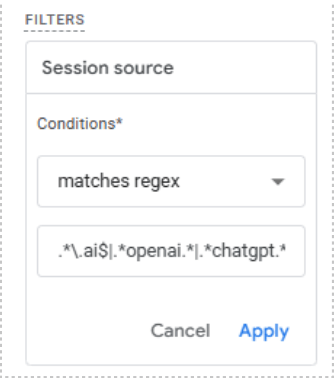
7. Next, select matches regex in the Select match type field.
8. Add the regex rule below on the Enter expression field:
.*\.ai$|.*openai.*|.*chatgpt.*|.*gemini.*|.*gpt.*|.*copilot.*|.*grok.*|.*deepseek.*|.*claude.*|.*mistral.*|.*qwen.*|.*tongyi.*|.*perplexity.*|.*google.*bard.*|.*bard.*google.*|.*bard.*|.*gemini.*google.*
9. Click Apply.
10. *Tip: You can add multiple dimensions or metrics depending on the report needs. To add them repeat steps 3, 4 and 5 with the desired dimensions and metrics.
11. The table will show data only for LLMs now.
Segment on Exploration Reports
This method is similar to Filter on Exploration Reports but uses an alternative way to capture LLM data which is through a Segment. This feature is slightly different to a Filter as Segments are applied to users, sessions or events while a filter is applied to dimensions or metrics. Segments are exclusive to Explorations. To capture AI traffic using a Segment, follow the steps below:
1. Go to the Explore section located on the left panel of your GA4 property.

2. Start a new exploration by clicking on the Blank template denoted by a + sign.
3. On the Variables column at the left, click on the + sign for Segments.
4. A panel opens from the right. Click Create a new segment.
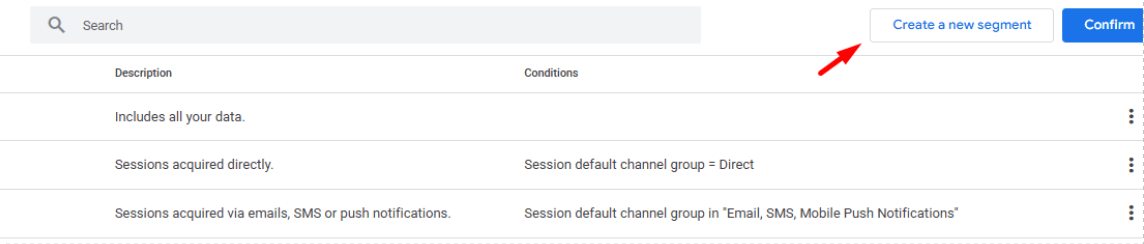
5. Click on Session segment.

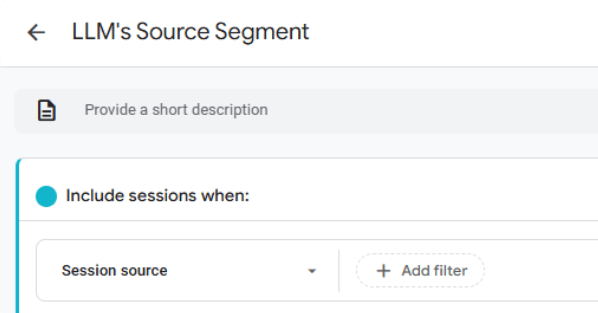
6. Give it a name and add Session Source in the Add new condition field.
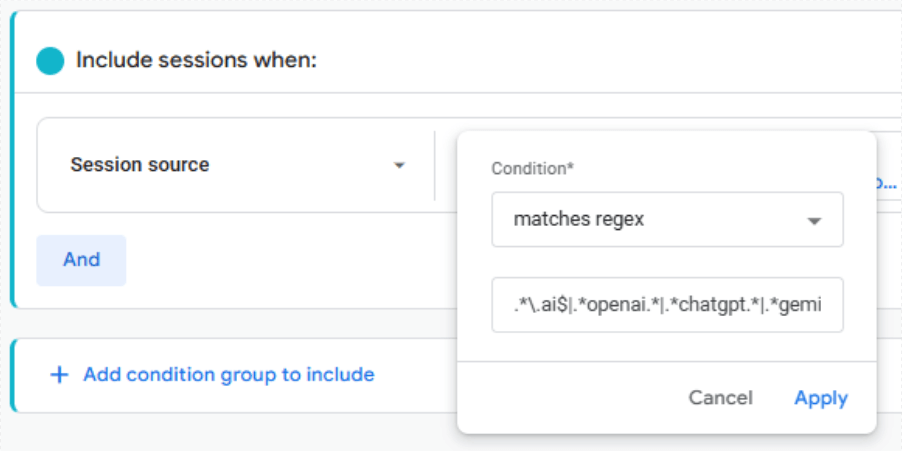
7. Click on Add filter and select matches regex on the Condition field.
8. In the box below enter the following regex rule:
.*\.ai$|.*openai.*|.*chatgpt.*|.*gemini.*|.*gpt.*|.*copilot.*|.*grok.*|.*deepseek.*|.*claude.*|.*mistral.*|.*qwen.*|.*tongyi.*|.*perplexity.*|.*google.*bard.*|.*bard.*google.*|.*bard.*|.*gemini.*google.*
9. Click Apply on the Condition box.
10. Click Apply on the Segment panel.

11. On the same Variables column, click on the + sign for Dimensions. Select Session Source. Alternatively, you can select First User Source. Click on confirm.
12. Click on the + sign for Metrics. Select Sessions if you chose Session Source. Select Total Users if you chose First User Source. Click on confirm.
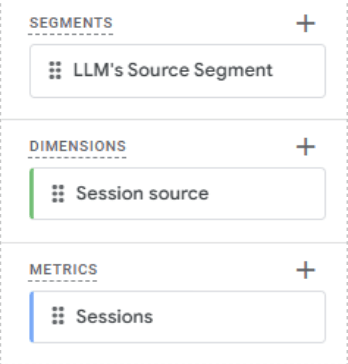
13. Double click on the segment, dimension and metric to add to the report. They will be added in the Settings column as well as in the table on the right. In the example below, the LLM’s Source Segment, Session Source and Sessions were double clicked.
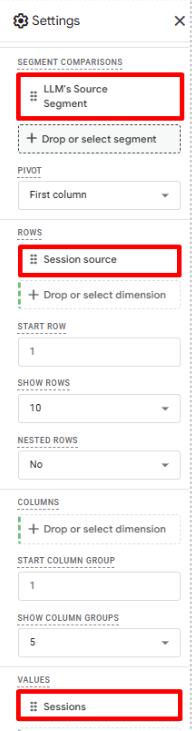
14. The table will show data only for LLM sources now.

Custom Channel Group
Another method to capture LLM traffic is by creating a custom channel on a new channel group. After creating the new channel group, a dimension with the same name will be created automatically. The new channel will show under this new dimension, and all AI sources will be grouped into this custom channel. To create a new channel specific to LLM traffic, follow these steps:
1. Go to Admin, located at the lower left corner of the GA4 property, denoted by a cog symbol.
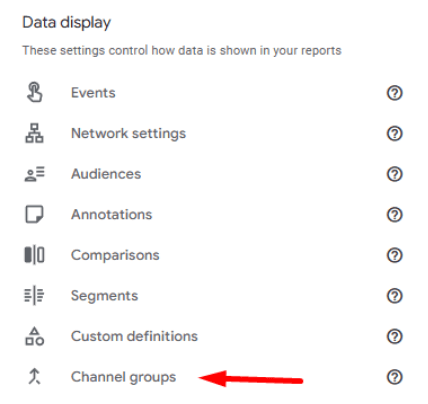
2. Click on Channel Groups on the Data Display section.
3. Click on Create a new channel group.

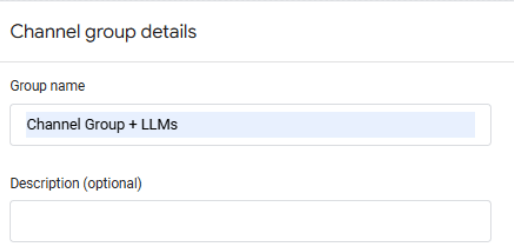
4. Give the channel group a name and, optionally, a description.
5. The default list of channels appears on the Channel List section. Click on Add new channel.

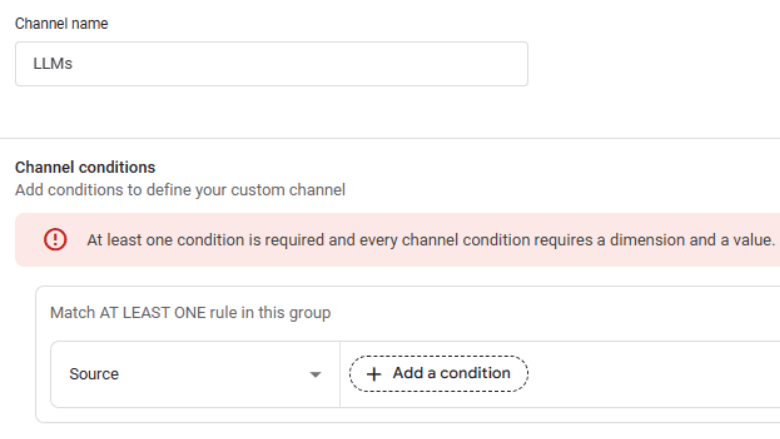
6. Give the new channel a name.
7. Click on Add condition group.
8. On the Add new condition field, select Source.
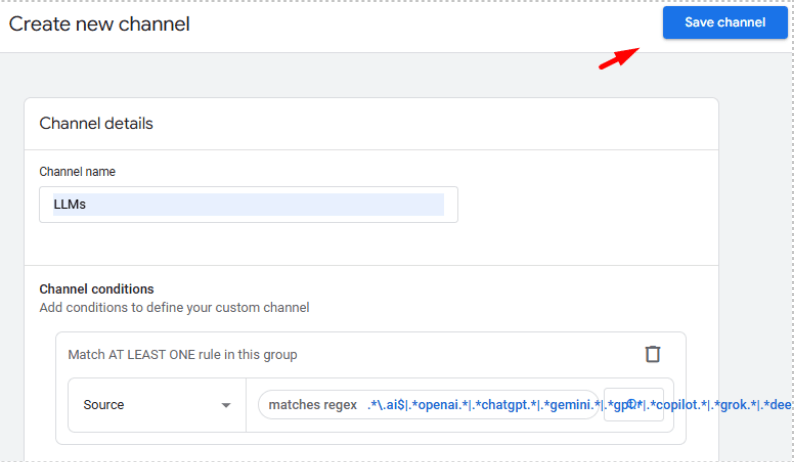
9. Click on Add a condition and select matches regex.
10.On the box below, add the following regex rule:
.*\.ai$|.*openai.*|.*chatgpt.*|.*gemini.*|.*gpt.*|.*copilot.*|.*grok.*|.*deepseek.*|.*claude.*|.*mistral.*|.*qwen.*|.*tongyi.*|.*perplexity.*|.*google.*bard.*|.*bard.*google.*|.*bard.*|.*gemini.*google.*
11. Click Apply.
12. Click Save channel.
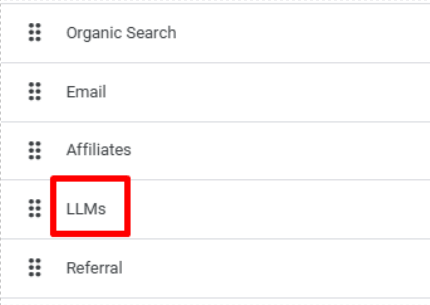
13. The new channel will be placed last, after all the other channels in the list. Click on Reorder.
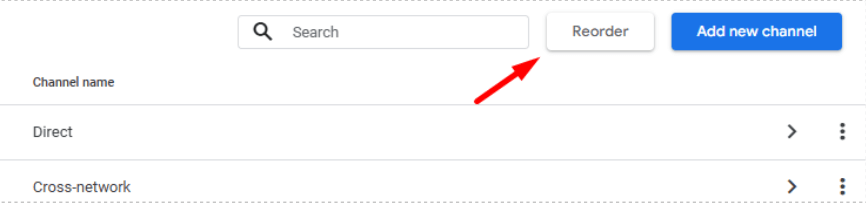
14. The order numbers in the list change into a six-dot symbol. Drag the new channel above Referral.
15. Click Apply.
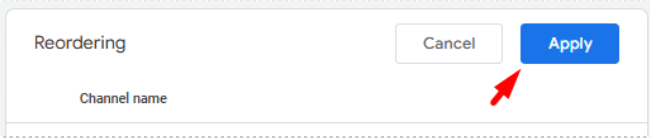
16. Click Save Group.

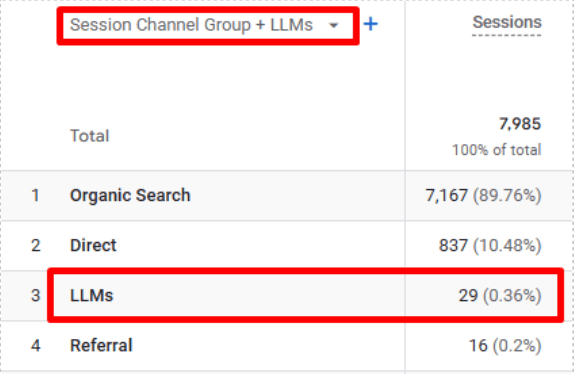
17. The new channel group will now show as a dimension on Standard reports (Reports section) and Explorations (Explore section). This dimension is also available in Segments. Below you can see how the new dimension shows on Explorations.

18. To test, go to the Traffic Acquisition report in the Reports section.
19. On the report table, below the graph, choose the dimension with the name of the new channel group. In the example below, I chose Channel Group + LLMs as the name for the new channel group, and LLMs as the name of the new channel. All AI traffic sources will be grouped under this new channel.
Custom Standard Report
This method focuses on creating a custom report on the Reports section. At least Editor access is needed on the GA4 property to create custom standard reports. To accomplish this, follow the steps below:
1. Go to the Reports section located on the left panel of your GA4 property.
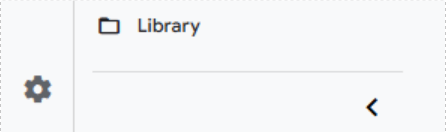
2. Click on Library at the lower left corner. If the user accessing the GA4 property does not have at least Editor access, the Library option will not appear.
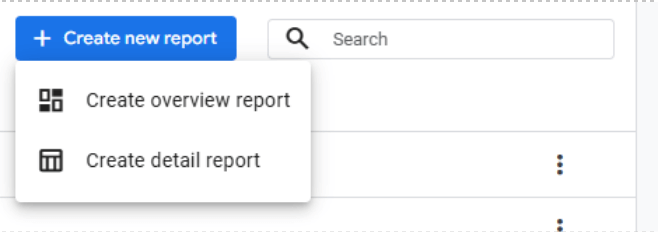
3. Click on Create new report, under the Reports section.

4. Select Create detail report.
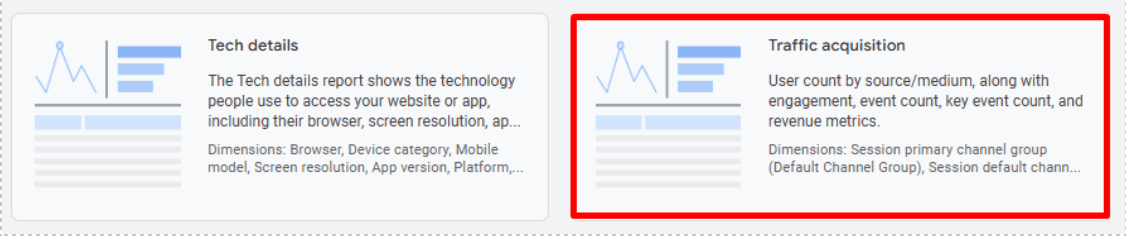
5. We are going to use a template. Select the Traffic acquisition template to report on session level dimensions. Alternatively, User Acquisition can also be selected to focus on user level dimensions.
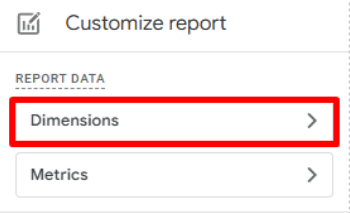
6. The default Traffic acquisition report appears. We are going to modify it. Select Dimensions on the top right corner.
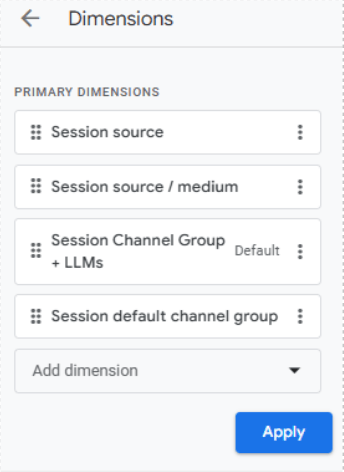
7. You will see a list of dimensions available. You can remove the dimensions that are not needed and keep the desired ones. To remove a dimension, click on the three dots at the right of the dimension and select remove. If you created a custom channel group, it will appear on the list of dimensions.
8. The dimensions on the list can be reordered by dragging the dimension box to the desired place.
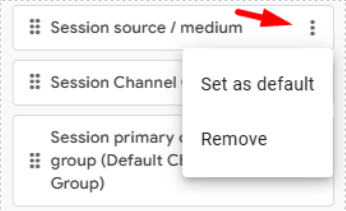
9. You can have one dimension as default so whenever you access this custom report, the default dimension will be the one selected. To do so, click on the three dots at the right and select Set as default.
10. *Tip: you can add the dimensions you need by clicking on Add dimension.
11. When you are done customizing the dimensions for the report, click on Apply.
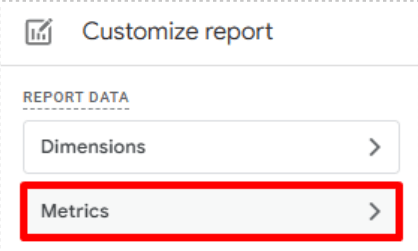
12. Click on Metrics.
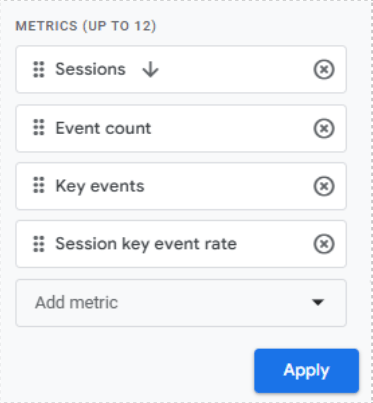
13. Similarly, you can delete or reorder the metrics shown. Deleting is easier here and is done just by clicking on the x symbol on the right of the metric.
14. *Tip: you can add the metrics you need by clicking on Add metric.
15. When the metrics list looks correct, click on Apply.
16. Click on Add filter on the Report filter section.
17. Choose Session source as dimension if you are using the Traffic acquisition template. For the User acquisition template, choose First user source.
18. Select matches regex on the Match Type field.
19. Add the regex rule below on the Value field:
.*\.ai$|.*openai.*|.*chatgpt.*|.*gemini.*|.*gpt.*|.*copilot.*|.*grok.*|.*deepseek.*|.*claude.*|.*mistral.*|.*qwen.*|.*tongyi.*|.*perplexity.*|.*google.*bard.*|.*bard.*google.*|.*bard.*|.*gemini.*google.*
20. Click Apply.
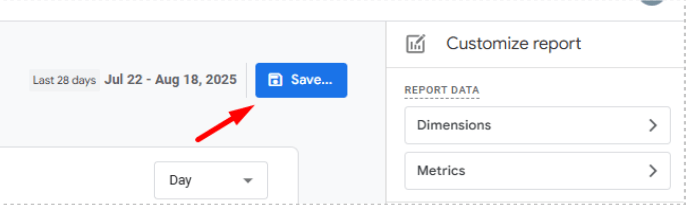
21. All changes will be reflected in the preview report on the left. Click on Save.
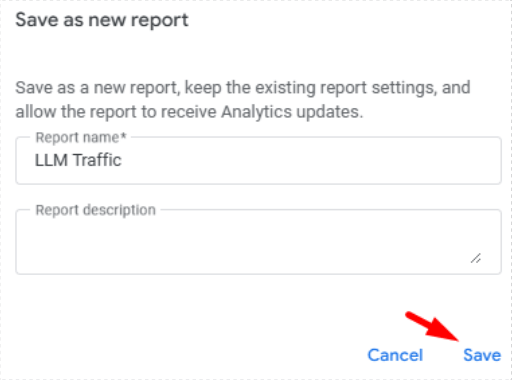
22. Give the report a name and, optionally, a description.
23. Click Save.
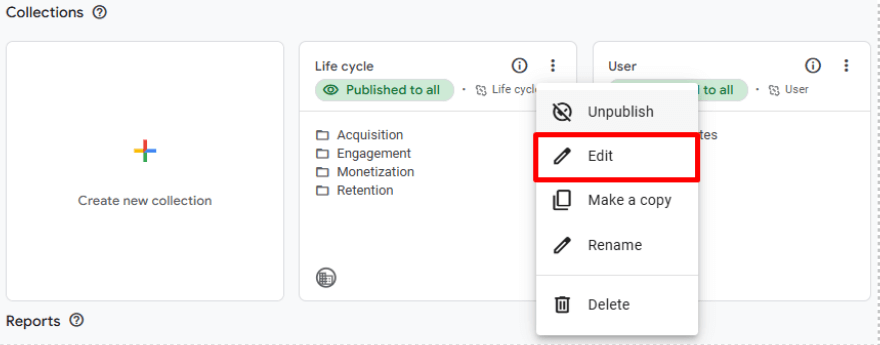
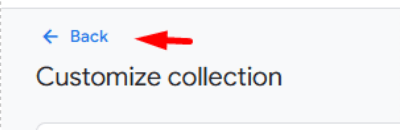
24. We are now going to add the custom report in the appropriate report section. Click on Back on the top left corner.
25. Click on the three dots on the Life cycle collection, under the Collections section. Select edit.
26. Search for the name of the custom report in the panel at the right. The report will show below the search reports box.
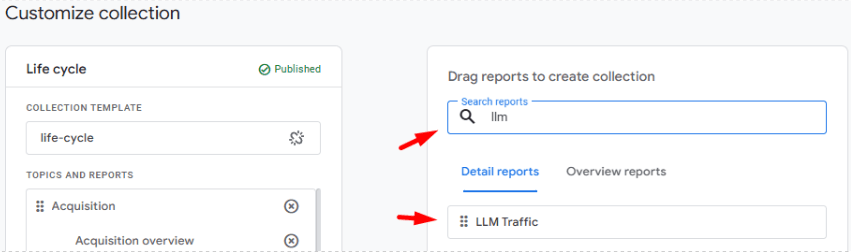
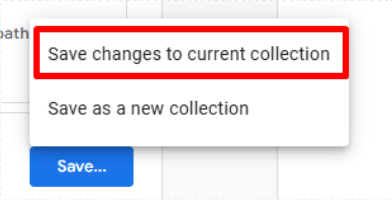
27. Drag the custom report box to the desired location. We suggest placing it in the Acquisition section, below the Traffic acquisition report.
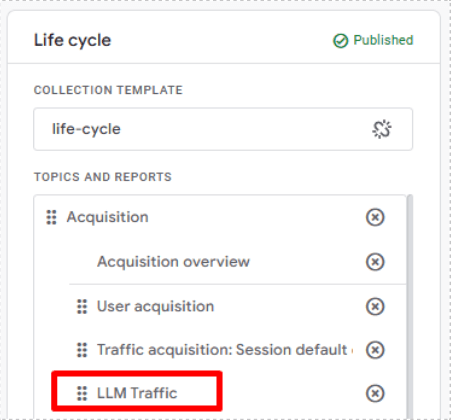
28. Click Save and then Save changes to current collection.
29. Click on Back at the top left corner.
30. You will find the new report in the desired place.
31. When clicking on the report, all the configured settings will show, including the filter.
Ready to Turn AI-Driven Traffic into Revenue?
LLMs like ChatGPT and Gemini are reshaping how buyers discover your brand. Don’t just track the traffic—convert it. With PROS Offer Marketing, SEO, and SEM solutions, you can:
- Optimize your content for AI visibility
- Drive high-intent traffic from emerging LLM channels
- Maximize ROI with intelligent, real-time offer marketing
Start capturing and converting LLM traffic today—talk to PROS.
Frequently Asked Questions
Tracking LLM traffic helps businesses understand how AI tools like ChatGPT and Gemini are influencing user behavior and driving website visits. This insight supports better content strategy, attribution modeling, and optimization for AI-driven discovery.
LLM referral traffic refers to website visits originating from Large Language Models and GenAI models like ChatGPT, Gemini, or Claude, which may suggest or link to your site.
You can use a regex filter on the session or first user source dimension to capture traffic from known AI/LLM domains and sources.
Common sources include ChatGPT, Gemini, Claude, Copilot, Bard, DeepSeek, Mistral, and others listed in the regex rules.
Yes, GA4 allows you to create a custom channel group that consolidates AI traffic sources under a single channel.
Google has indicated plans to add a dedicated channel for AI-generated traffic, but implementation may take time.
Filters apply to dimensions or metrics in reports, while segments target users, sessions, or events—both can be used to isolate AI-driven traffic.